The Facebook Conversion API lets you send website conversion events from your server to Facebook.
This is useful for tracking conversions that happen offline or on mobile apps, and it also reduces the risk of data loss due to browser issues.
When paired with Google Tag Manager’s server-side container, you can use the Conversion API without needing any Facebook pixel code on your website. However, Facebook recommends using CAPI along with FB Pixels.
This article will explain how to set up the Facebook Conversion API with a Google Tag Manager server-side container.
5 Benefits of Using the Facebook Conversion API
Here are some of the main benefits of using the Facebook Conversion API:
- Tracks conversions that happen offline or on mobile apps. The Conversion API allows you to send conversion data to Facebook that doesn’t originate from your website. This is great for tracking in-store purchases, call center orders, mobile app conversions, etc.
- Avoid website tag conflicts. With the server-side setup, you don’t need to add any Facebook pixel code to your website. This prevents potential tag conflicts and reduces implementation time.
- Improve conversion data quality. The Conversion API provides more accurate conversion data by reducing discrepancies caused by browser ad blockers, connectivity issues, etc.
- Prioritized over web pixel data. Facebook will prioritize Conversion API data over web pixel data. So, sending conversions via the API will result in better optimization of your Facebook campaigns.
- Expanded conversion metadata. The Conversion API allows you to include expanded conversion metadata like predicted lifetime value, contents, predicted magnitudes, etc.
Prerequisites
To use the Facebook Conversion API with Google Tag Manager’s server-side container, you will need:
- A Facebook ad account is enabled for the Conversion API
- Conversion API access token
- Google Tag Manager account with server-side container setup
How To Configure Facebook Conversion API For GTM Server-Side Container
Step 1:
Make sure you have Admin/Developer access to the Facebook business manager account. If not possible, request full access to the Pixel in the account to copy the test event code and the Pixel ID and ask the client to generate an access token for you.
Make sure you have access to the server container and the web container using the same email (example@analytics.com)
*It must be the same email address to connect both containers in preview mode.
The following are three variables that need to be updated:
- Facebook pixel ID (Requires full access to the Pixel)
- CAPI token (Requires Admin/Developer access)
- CAPI test event code (Requires full access to the Pixel)
Step 2:
Facebook Conversion API Settings
Now, head over to your Facebook Business Manager.
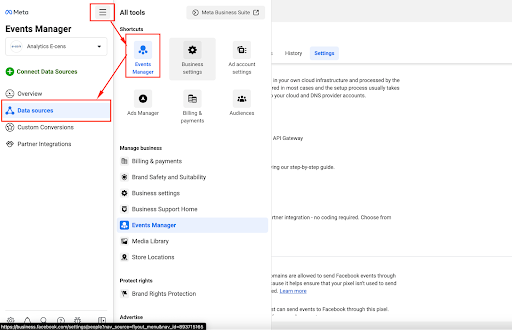
Go to the Events Manager and select the Data Sources from the left menu.
Note: we need admin access to your business manager account to generate an access token.
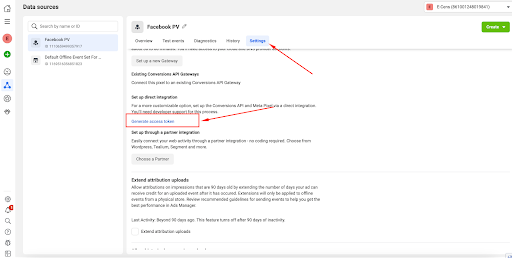
1. Go to your Settings tab.
2. Then scroll down to the Set up direct integration section and click Generate access token.
3. Copy it and save it.
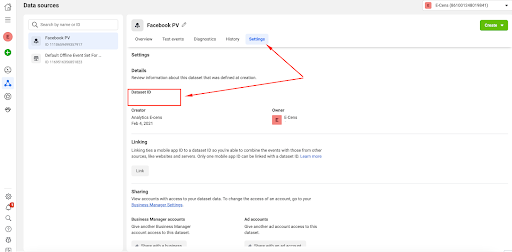
4. In the Settings tab, copy the Pixel ID and save it.
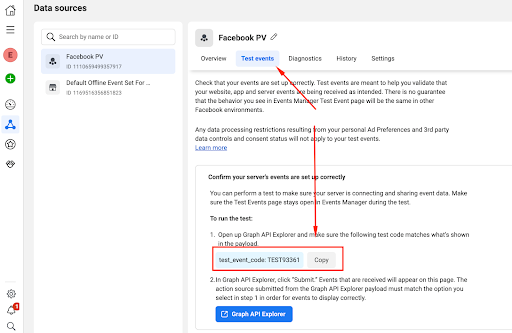
5. In the Test Events tab, copy the test_event_code and save it.
Step 3:
Go to the Server Container.
1. Create a constant variable and paste the access token from Step 2 into it.
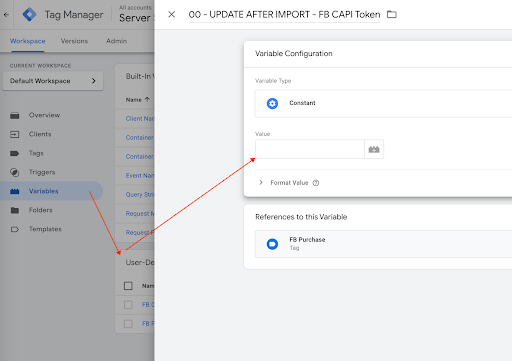
2. Create another constant variable and paste the Pixel ID into it.
3. Import the Facebook Conversion API tag template in the workspace.
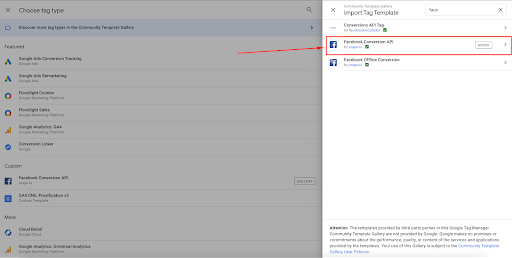
4. Create a new tag using the Facebook Conversion API template.
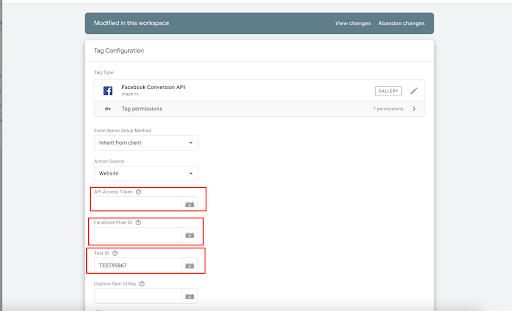
5. Fill in the API Access Token with the token variable you have created and fill in the Facebook Pixel ID with the Pixel ID variable as well, and for the Test ID, fill it with the test_event_code you have copied from the FB account.
6. Create a trigger with conditions as the following:
– Client Name – equal – GA4. (The GA4 client name might be different)
– Choose the Event Name built-in variable to specify the events you want or discard this condition to capture all the events coming from the FB tags in the web container.
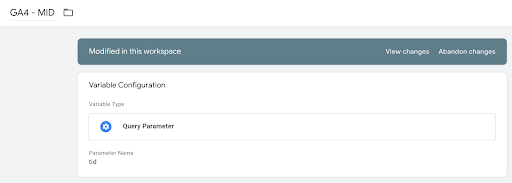
– Create a Query Parameter variable (e.g., GA4 – MID) and add “tid” in the parameter name field (to not trigger the tag on any request that has a different mid).
– In the same trigger, add another condition using the Query Parameter variable to specify the source of the data. (the value will be the measurement ID you use in the web container)

Step 4:
Go to the Web container.
Create a Google tag and add a dummy measurement ID (using real mid will send unwanted data to the GA4 report) and add the following two parameters:
1. server_container_url (go to the server container > admin > container settings and copy the server URL)
2. first_party_collection and give it a value of “true”
3. send_page_view and give it a value of “false”

3. send_page view and give it a value of “false”
* If Facebook Pixel tags are already installed in the Web container, then we’ll create a server tag for each Facebook tag.
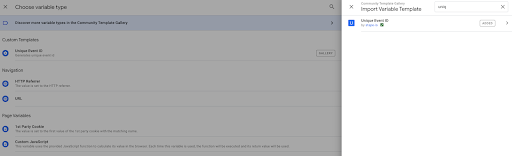
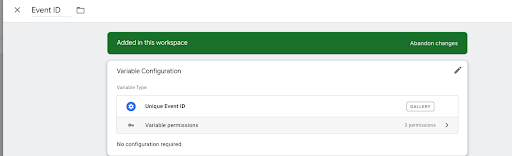
Create an Event ID variable using the “Unique Event ID” Template from the Community Template Gallery
– FB CAPI pageview example:
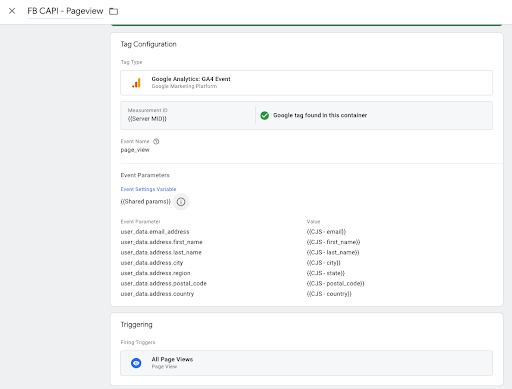
If you’re sending user data, then use the naming in the following table under the “GA4 Field Name”
Now, we need to create three common variables that will be used in each tag:
1. Event ID
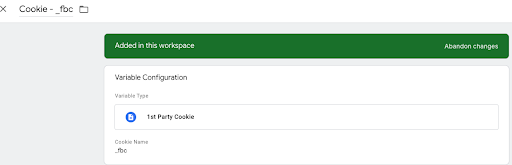
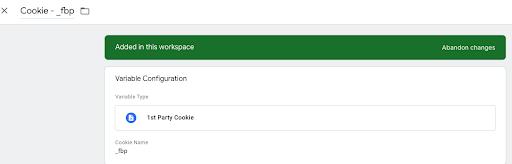
2. Variable for the _fbc cookie and variable for the _fbp cookie
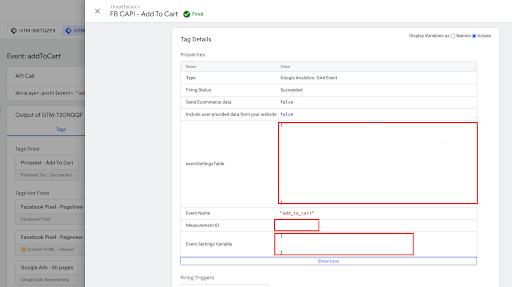
3. Now, we can create a Google Tag: Event Settings variable to create a shared variable of these three variables.
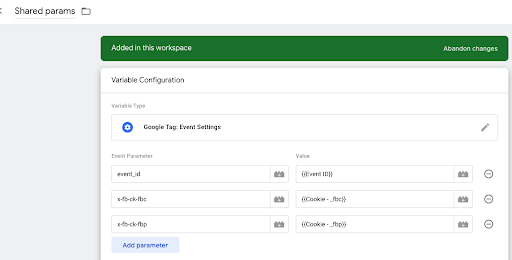
3. Now, we can create a Google Tag: Event Settings variable to create a shared variable of these three variables.
*Use this in every tag as shown in the previous FB CAPI pageview tag
Let’s take an example of how to create an FB CAPI tag from an existing FB Pixel tag:
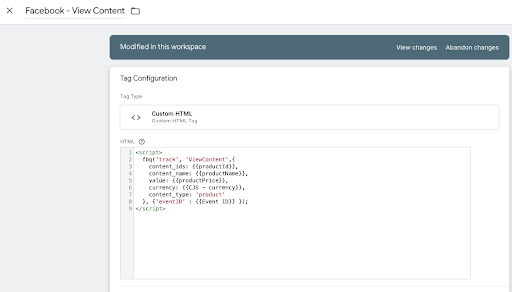
– FB CAPI Tag (ViewContent)
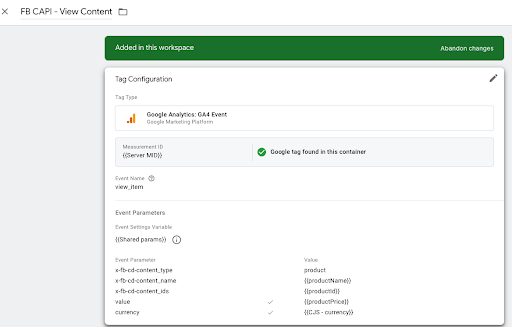
Use the same dummy mid used in the Google Tag
Google standard events (e.g. page_view, view_item, select_item etc…) can be sent as it’s to the server container, and Facebook will map the equivalent meta events (e.g. PageView, ViewContent, etc…)
Validation
Facebook Business Manager
Preview the web container and the server container
Trigger any events (e.g. add_to_cart)
Go to business.facebook.com > events manager > data sources > facebook pixel > test events tab
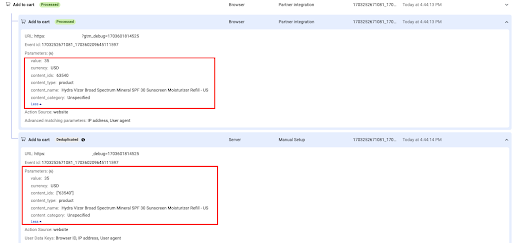
If everything works fine, you should see two instances of the event with the same event ID (one from the web pixel and another from the server API)
We must check if both are coming and the deduplication works as indicated below.
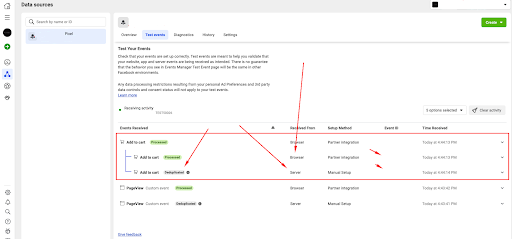
– Click on both instances, the web and the server, to check if the parameters are identical or is missing.
Web Container
– If there’s any missing param then go the tag assistant of the web container and confirm if the data is getting populated correctly in the server tag:
– If the data is populated correctly, then open the preview mode of the server and confirm if the event is received and the tag is triggered
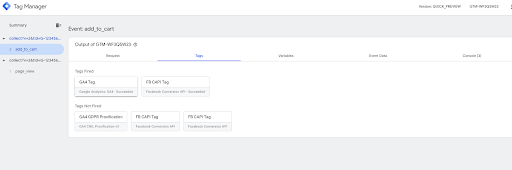
Server Container
– If the tag is not firing, then check the trigger in the server container and if the measurement id you are using in the web container is correct and the server container URL as well
– If triggered, open the tag and check if the data is getting captured as expected.

– Open the outgoing HTTP request also to check if the parameters are getting send to Facebook

– If the server event is not displayed in the test events in the FB events manager, then check if the test_event_code matches the one in the test events.
You may have to manually add the parameters to the server tag in the server container to see them in the test events.
* Create an “Event Data” variable to capture the parameters coming from the Web container.
We’ve completed all the steps required to send test conversions to your Facebook Conversion API via Google Tag Manager.
Conclusion
Configuring the Facebook Conversion API with a Google Tag Manager server container provides a powerful way to expand your conversion tracking.
Since the API sends data directly from your server, you can capture both online and offline conversion events.
Pairing it with Google Tag Manager reduces your website’s implementation friction and tag conflicts.
To recap, the key steps are:
Configure the GA4 tag in the website container
- Create conversion events
- Trigger events appropriately
- Add GA4 client in the server container
- Create a Facebook Conversion API tag
- Pass the same event IDs for deduplication
Refer to Facebook’s documentation for additional configuration details and options.